Showing posts with label Resin Models. Show all posts

Command Units

10/01/2015 Add Comment

The Eastern Front was very fluid.  Even command units had to be ready to defend themselves.


Troops had to keep their weapons ready.


Sometimes light armor had to be assigned to command units in order to protect them.


Often the Germans fought outnumbered and even surrounded.


Poor quality resin kits, note the air bubbles.

Making Resin Models

4/02/2009 Add Comment

Resin models are simple, quick and easy to build if they are from Paul Heiser Models. Different resin companies have different philosophies on how to make models in resin and Paul Heiser Models are made for a high end wargame model. Use the same tools that you use for injected molded styrene plastic model kits. Sprue cutter, stick sander, tweezers, pin vise and drill bits, X-Acto knife break off cutter, and #11 X-Acto knife blade and handle, and small files all displayed here on a cutting mat surface. Alternate tools to replace some of these work fine too, sandpaper rather than stick sander for example.
Most resin models are made with a liquid silicone mold release that needs to be washed off with soap and water before construction begins. Simple warm water in the kitchen sink with dishwashing soap and a tooth brush is fine to do this task. Other resin kits are cast using talc as a mold release, it is less critical to clean this off, but it is best to wash it off too.
Lay the parts out and inspect them. Use the sprue cutter to trim the sprue off, if any. Often resin kits have small vents to allow air to vent from the mold and these vents fill with resin. A quick snip with the sprue cutter and they are gone. Use the knife blades to trim the flash. Resin models have more flash than regular injection molded plastic kits, but it is very easy to remove. Once the major flash has been removed use the sanding stick to smooth off the remaining flash or tool marks.


Inspect the parts once you think you have all the flash removed. Test fit the parts to make sure they fit properly. Sometimes more resin will need to be removed to make sure the parts fit properly.


Many resin parts are made with an open face, single part mold. This can leave a very glossy smooth surface, usually on the back or underside of the parts. These halftrack suspension pieces need a quick brush of the sanding stick to rough up that very smooth surface. A rough surface will create a texture for the glue to stick to and make a more durable model.


Here the model has been test fitted again just prior to being glued together. Use CA Superglue or epoxy glue to hold the parts together. I like epoxy better for larger parts and CA for smaller delicate pieces that need to look nice. The CA is more invisible than the epoxy which can be pretty thick.
Rummage the spares box and look for accessory parts that may enhance the quality of the completed model. On my halftracks I added gas cans, a saw, a shovel, and a spare tire, and of course machine guns to the shields. Once completed, the model should be primed

Unarmoed Allied Halftrack

3/18/2009 Add Comment

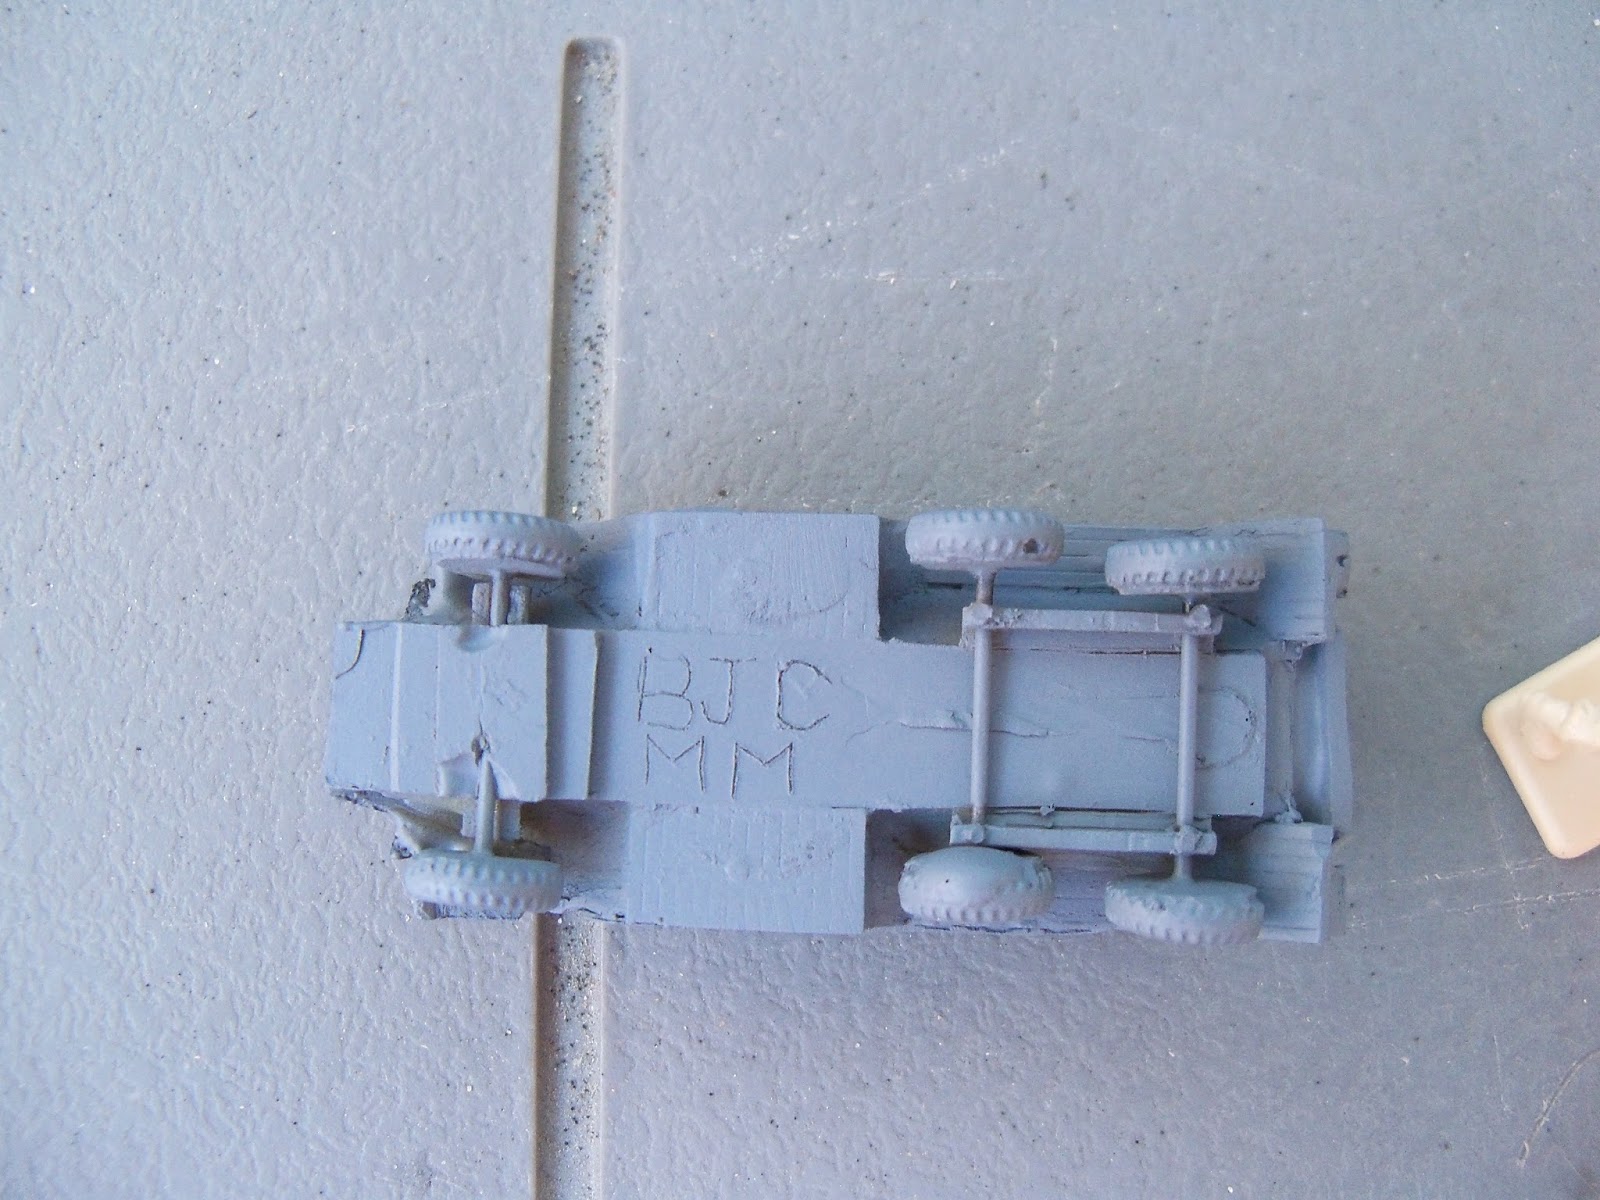
This is the Autocar halftrack by Bill Jr. Custom Military Models. The Autocar halftrack saw very limited use by the US Army in World War Two but was also shipped overseas to the Soviet Union in moderate numbers.


This is the underside of the cargo compartment. While at first glance, these models appear complicated and poorly made, this is not the case at all. This is actually a fairly easy model, it just looks hard. Most of the flash seen in the top photo can be removed easily, in fact, most can be snapped off with your bare hands. A quick trim with the X-Acto blade and brush with the sanding stick and most of these parts will be cleaned up pretty fast. This big flat piece can be flipped over and then sanded down on a big piece of sandpaper. Another fast and simple project.


When these parts are flipped over you can see the quality of these parts. The detail on the cab, tracks and winch is excellent.


Look at the detail in the grill of the cab and the bumper winch. These are good kits and if you want a very unusual halftrack for your American or Soviet WWII forces this is a good one to get.


Resin Construction

3/13/2009 Add Comment
Many people don't build resin models because they are intimidated by the material. Many people seem to think there is some secret alchemy going on and that resin is the realm of the master modeller. Only the most expensive and difficult kits are made in resin and the average modeller could never hope to succeed in building one, or not.


Using the same sort of tools you use for a styrene model kit you can build most resin kits. An X-Acto knife with #11 blade, a sanding stick or very fine sandpaper, a sprue cutter, cutting board all usually all you need. Depending on the kit, a pin vise and tiny drills can be helpful to drill out holes for machine guns or radio antennas. Sometimes a heavier knife is helpful, or various other grades of sanding sticks or sand paper, and maybe tweezers if there are little bits.


I like to use a five minute epoxy glue, sold in most hobby shops, similar glues are sold in most hardware stores, or even Target stores. I like the five minute because you don't have to hold it very long. Superglues work well too, but I think the epoxy is more gap filling and holds a stronger bond. In either case, just use a little bit of glue evenly spread on the surface to glue.


Resin kits often have lots of excess resin to trim off. Don't let this worry you. It is just like the excess plastic on regular kits and it actually trims off much easier than the extra plastic on soft plastic figures. I cut the bit parts, if any, with the sprue cutter. I then trim the rest down with the knife blade. Finally a brush of the sanding stick just to smooth things out. Since I don't see well close up, I like to use a magnifying glass to inspect my work. I actually wear one of those visor things. For $10 you can get on at Harbor Freight Tools or similar places. Don't spend a lot of money one.


One of the best things about resin kits is the tracks are usually one left side part and one right side part. So much easier than most model kits. Usually there is a bit of flash between the road wheels. Since this assembly will be glued to the side of the hull only part of the flash really needs to be removed. The part of the tracks that is below the lower hull should be cleaned out with your X-Acto knife, the rest you can leave in.


A Bill Jr's Custom Military Models M4A3 and M36B2 models, cleaned up in about an hour total time. The gun mantlet on the tank destroyer took a bit of time but the rest was pretty quick. So contact Fidelis Models, or Bill Jr and buy some resin kits to increase your forces. It is surprising easy.


Bill Jr's 247

12/05/2008 Add Comment


At long last the assembled photos of Bill Jr's Custom Military Models German WWII Sd.Kfz. 247 kit. I worked on this model off and on for several weeks. It is HO scale, 1/87th, made in resin.

The model goes together okay, the top and bottom hull parts don't fit perfectly but with a little fooling around they matched up well. I put it together with 5 minute epoxy glue. It has good gap filling properties and when dried can be sanded, cut and painted like the resin.


The command car is painted in Tamiya German Panzer Grey, and I overall brushed it with Rustall. Decals are from some old Fujimi kit from the spares box. Only a few of these were made and they were used as high level command vehicles. I got one for my SS Panzer Korps HQ. A good kit, I like it!